


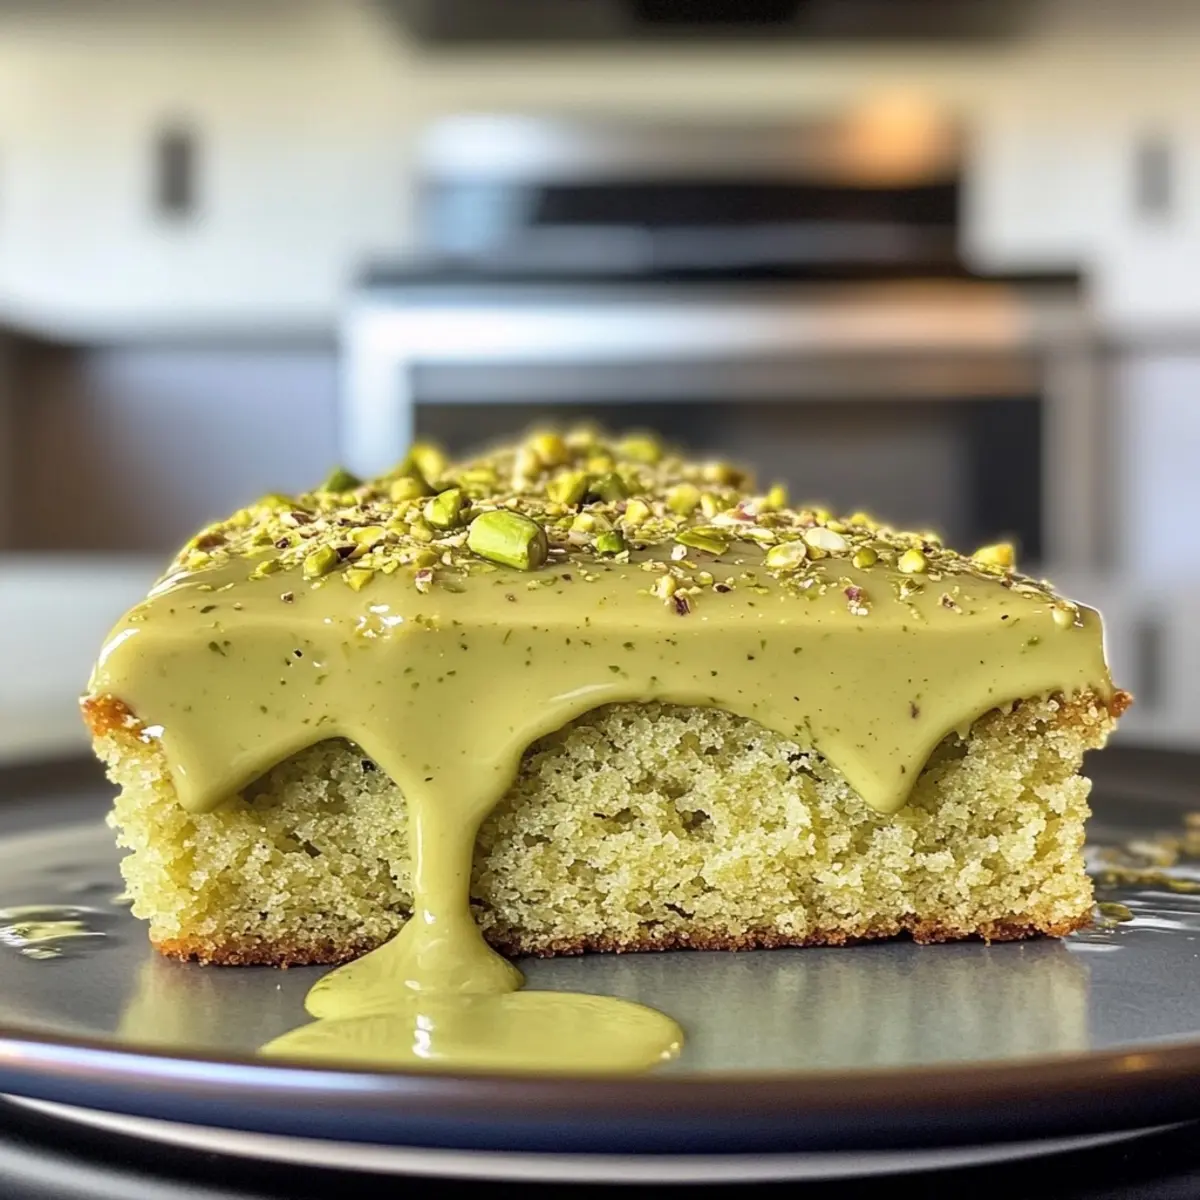
Picture this: a warm, inviting kitchen filled with the comforting aroma of baked goods wafting through the air. That was the scene last weekend when I decided to whip up a batch of my beloved Pistachio Dream Sheet Cake. With its vibrant emerald color and the delightful scent of nutty goodness, this cake instantly transforms an ordinary day into a special occasion.
Whether you’re planning a whimsical birthday celebration or just seeking to indulge in a comforting dessert after a long week, this cake is an absolute must-try. The beauty of this recipe lies not only in its rich texture but also in its simplicity; it comes together effortlessly, allowing you to spend more time enjoying and less time stressing. Trust me, it’s an indulgence you’ll want to share—your friends and family will be enchanted by both its stunning appearance and the heavenly flavor. Ready to dive into this delightful baking adventure? Let’s get started!
Why is Pistachio Dream Sheet Cake unforgettable?
Decadent taste: The nutty, sweet flavor of ground pistachios shines through every bite, creating a cake that’s both comforting and unique.
Effortless preparation: With straightforward instructions, even novice bakers can achieve perfection.
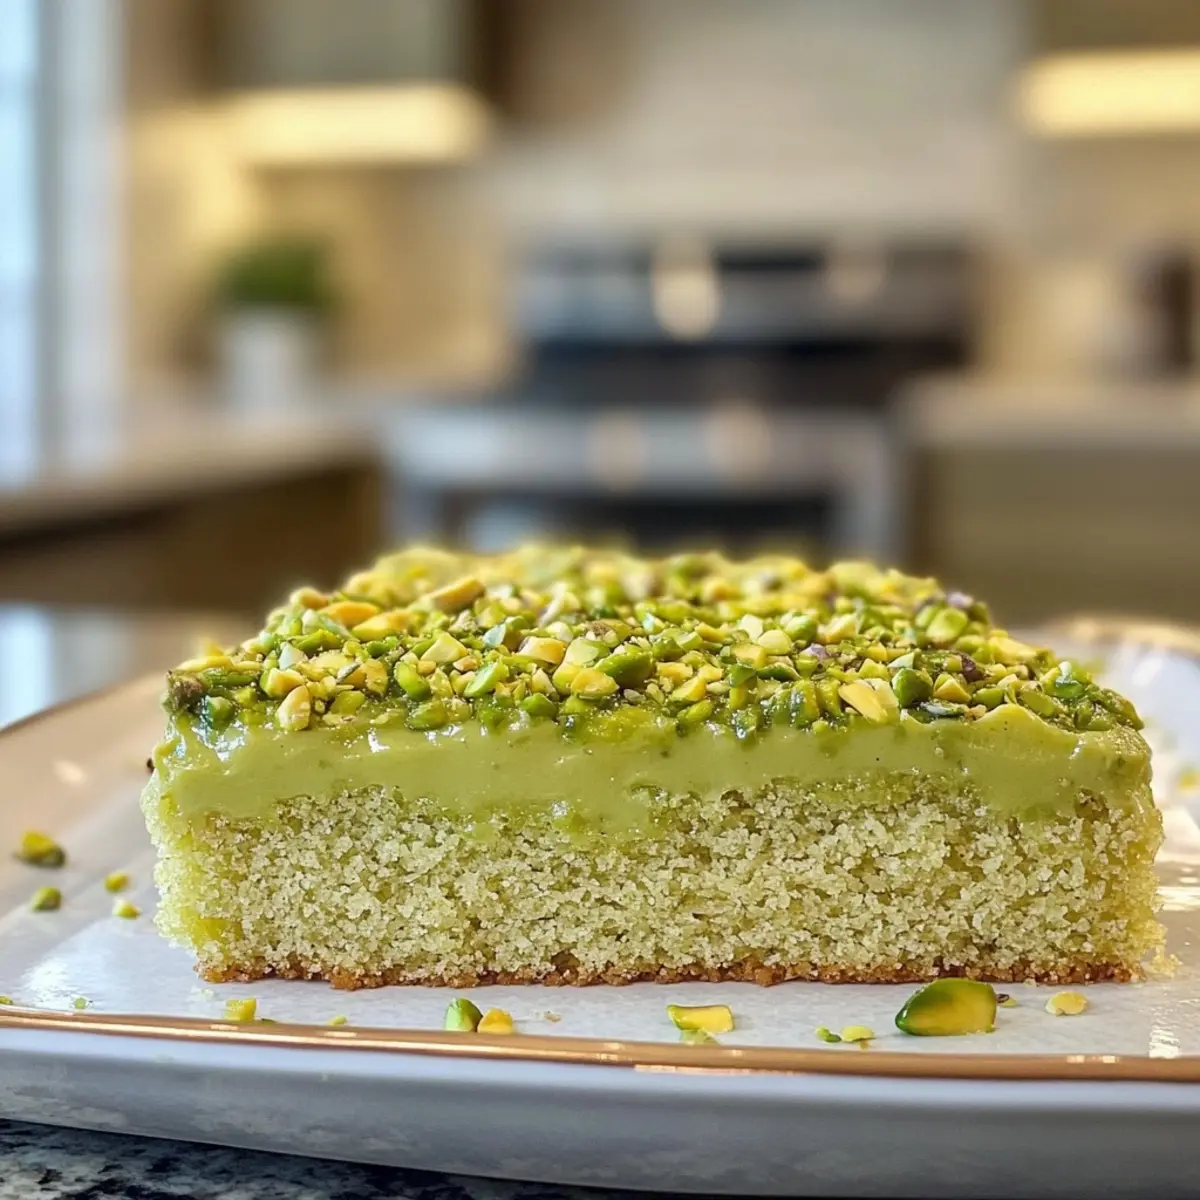
Visual appeal: Its enchanting green hue makes it a showstopper at any gathering.
Versatility in serving: Pair it with cream cheese frosting, fresh berries, or even a scoop of pistachio ice cream! If you’re looking for another delightful dessert, consider trying the Strawberry Cream Cake.
Perfect for celebrations: Whether it’s a birthday or a cozy family dinner, this cake brings joy to every table.
With this Pistachio Dream Sheet Cake, you’re not just baking; you’re creating memories that will linger long after the last crumb has been enjoyed.
Pistachio Dream Sheet Cake Ingredients
For the Cake
- All-Purpose Flour – Provides structure for the cake; substitute with a gluten-free flour blend if needed.
- Ground Pistachios – Infuses nutty flavor and vibrant green color; finely chopped walnuts or almonds can be used for a different twist.
- Baking Powder – Acts as a leavening agent; make sure it’s fresh for the best rise.
- Salt – Enhances the cake’s flavor profile.
- Eggs – Binds the ingredients and contributes to moisture; vegan bakers can use flax eggs (1 tbsp flaxseed meal + 3 tbsp water = 1 egg).
- Granulated Sugar – Adds sweetness and moisture; consider coconut sugar for a lower glycemic alternative.
- Melted Butter – Brings richness and moisture; for a dairy-free option, substitute with vegetable or melted coconut oil.
- Milk – Helps create a tender crumb; feel free to use any non-dairy milk of your choice.
- Vanilla Extract – Acts as a flavor enhancer; swap in almond extract for a unique kick.
- Optional Almond Extract – Offers a distinct flavor layer; feel free to skip it if you prefer simplicity.
How to Make Pistachio Dream Sheet Cake
- Preheat Oven: Start by preheating your oven to 350°F (175°C). This ensures the cake will bake evenly and perfectly!
- Prepare Baking Sheet: Line a rectangular baking sheet with parchment paper. This helps prevent sticking, making it easier to remove your beautiful cake later.
- Mix Dry Ingredients: In a large bowl, whisk together all-purpose flour, ground pistachios, baking powder, and a pinch of salt. This combination forms the flavorful base of your cake!
- Whisk Wet Ingredients: In another bowl, beat the eggs, granulated sugar, and melted butter until well combined. Add in the milk and vanilla extract, mixing until smooth for a luscious batter.
- Combine Mixtures: Gradually add the dry ingredient mix to the wet ingredients, gently stirring until just combined. Remember, a few small lumps are perfectly fine; we don’t want to overmix!
- Bake: Pour the batter into the prepared baking sheet and spread it out evenly. Bake for about 30 minutes, or until a toothpick inserted in the center comes out clean.
- Cool Down: Once baked, allow the cake to cool in the pan for 10 minutes. Then, carefully transfer it to a wire rack to cool completely before slicing into delightful pieces.
Optional: Top with a sprinkle of chopped pistachios for added crunch and flavor!
Exact quantities are listed in the recipe card below.

How to Store and Freeze Pistachio Dream Sheet Cake
Fridge: Keep any leftover cake in an airtight container for up to 5 days to maintain its moist texture and flavor.
Freezer: For longer storage, wrap the cooled cake tightly in plastic wrap and place it in a freezer-safe container, where it will stay fresh for up to 3 months.
Reheating: When ready to enjoy, thaw the cake in the fridge overnight, then warm it in the oven at 350°F (175°C) for about 10–15 minutes for that fresh-out-of-the-oven experience.
Garnish: Consider adding fresh chopped pistachios or a dusting of powdered sugar just before serving to enhance visual appeal and taste!
Pistachio Dream Sheet Cake Variations
Feel free to let your creativity shine with these tempting twists on the classic recipe!
- Gluten-Free: Replace all-purpose flour with a gluten-free flour blend for a deliciously adaptable option.
- Nut Alternatives: Use finely chopped walnuts or almonds instead of pistachios for a different flavor profile. The texture will be just as delightful!
- Dairy-Free: Swap melted butter with vegetable or coconut oil, and use non-dairy milk for a fully vegan treat. You’ll still get that moist cake texture!
- Citrus Zest: Add a teaspoon of lemon or orange zest to the batter for a zesty lift that beautifully brightens the cake.
- Spice It Up: Incorporate a dash of cinnamon or nutmeg into the dry ingredients for a warm, comforting flavor that adds depth.
- Frosting Variation: Top with cream cheese frosting or whipped cream for a rich and luscious finish that elevates each slice.
- Chocolate Drizzle: Drizzle a warm chocolate ganache over the top, providing a luscious contrast to the nutty cake that’s simply irresistible.
- Fruit Addition: Mix in some fresh raspberries or blueberries for a burst of fruity sweetness within the cake itself, creating a delightful surprise in each bite.
Let these variations inspire a new favorite family recipe; the possibilities are endless!
Expert Tips for Pistachio Dream Sheet Cake
- Room Temperature Ingredients: Ensure eggs, milk, and butter are at room temperature for better mixing and a lighter cake texture.
- Accurate Measurements: Use a kitchen scale or the spoon-and-level method for flour to prevent a dense cake from too much flour.
- Gentle Mixing: Combine wet and dry ingredients until just mixed; overmixing can lead to a tough texture in your pistachio dream sheet cake.
- Check for Doneness: Insert a toothpick into the center of the cake—if it comes out clean, your cake is ready; avoid opening the oven too early.
- Cool Completely: Allow the cake to cool completely before slicing to achieve neat pieces and prevent sogginess from residual heat.
What to Serve with Pistachio Dream Sheet Cake?
Pairing the perfect accompaniments can elevate your Pistachio Dream Sheet Cake into a full dessert experience that delights the senses.
- Whipped Cream:
Light and fluffy, whipped cream adds a delightful contrast to the cake’s rich nutty flavor, creating a creamy layer of joy. - Fresh Berries:
Raspberries or strawberries can provide a refreshing tartness that cuts through the sweetness, balancing the dish beautifully. - Pistachio Ice Cream:
The creaminess of pistachio ice cream deepens the nut flavor and makes each bite an indulgent treat, perfect for warmer days. - Greek Yogurt:
A dollop of tangy Greek yogurt adds a nice touch of creaminess and a hint of tartness that complements the cake’s sweetness. - Coffee or Espresso:
Rich, bold coffee enhances the dessert experience, adding a warmth that pairs perfectly with the cake’s nutty notes. - Citrus Zest:
A sprinkle of lemon or orange zest on top brightens the cake’s flavor, adding a zesty zing that refreshes the palate.
For an even more delightful experience, combine your favorites for a dessert platter that will wow guests and create sweet memories together!
Make Ahead Options
These Pistachio Dream Sheet Cake preparations are a lifesaver for busy home cooks! You can prepare the dry ingredients and whisk them together up to 24 hours in advance, storing them in an airtight container to maintain freshness. Additionally, the batter can be prepared ahead of time and refrigerated for up to 3 days—just be sure to let it sit at room temperature for about 30 minutes before baking to avoid any drastic temperature changes that could affect the rise. For the best flavor and texture, avoid adding any frosting until you’re ready to serve, keeping the cake just as delightful as when you first baked it. This way, you can effortlessly enjoy your cake with minimal effort after a hectic day!
Pistachio Dream Sheet Cake Recipe FAQs
What should I look for when choosing pistachios?
Absolutely! Opt for shelled pistachios that are vibrant green in color without dark spots or blemishes. Fresh pistachios smell nutty and earthy. Store them in an airtight container in a cool, dry place for the best flavor.
How should I store leftover Pistachio Dream Sheet Cake?
For sure! Keep any leftover cake in an airtight container and refrigerate it for up to 5 days. If you want to preserve it longer, freezing is a fantastic option.
Can I freeze Pistachio Dream Sheet Cake?
Absolutely! To freeze, allow the cake to cool completely. Wrap it tightly in plastic wrap and then in aluminum foil or place it in an airtight freezer-safe container. It’ll stay fresh for up to 3 months. When ready to enjoy, thaw in the fridge overnight and then warm it in the oven for that fresh-baked taste.
What are common issues I might encounter while baking?
Very! If your cake is dense, it could be due to overmixing or too much flour. Always measure accurately. If it domes in the middle or sinks after baking, that could indicate an oven that’s too hot; an oven thermometer can help avoid this.
Are there any allergy considerations with this recipe?
That’s a great question! Since this cake contains nuts, it’s essential to be mindful of any nut allergies. For a nut-free option, consider using finely chopped cookies or alternative flavorings instead of ground pistachios. As for gluten sensitivity, a gluten-free flour blend works remarkably well!
Can I add different flavors to my Pistachio Dream Sheet Cake?
Absolutely! Feel free to experiment with flavored extracts, like almond or lemon. Incorporating spices like cinnamon or nutmeg can also add a lovely depth to the flavor profile. Enjoy the creative process!

Indulgent Pistachio Dream Sheet Cake That Will Wow You!
Equipment
- Oven
- Mixing bowls
- Whisk
- Baking sheet
- Parchment paper
Ingredients
For the Cake
- 2 cups All-Purpose Flour Substitute with a gluten-free flour blend if needed.
- 1 cup Ground Pistachios Finely chopped walnuts or almonds can be used for a different twist.
- 1 tbsp Baking Powder Make sure it’s fresh for the best rise.
- 1/2 tsp Salt Enhances the cake’s flavor profile.
- 4 large Eggs Vegan bakers can use flax eggs (1 tbsp flaxseed meal + 3 tbsp water = 1 egg).
- 1 cup Granulated Sugar Consider coconut sugar for a lower glycemic alternative.
- 1/2 cup Melted Butter For a dairy-free option, substitute with vegetable or melted coconut oil.
- 1 cup Milk Feel free to use any non-dairy milk of your choice.
- 2 tsp Vanilla Extract Swap in almond extract for a unique kick.
- 1 tsp Optional Almond Extract Feel free to skip it if you prefer simplicity.
Instructions
How to Make Pistachio Dream Sheet Cake
- Preheat your oven to 350°F (175°C).
- Line a rectangular baking sheet with parchment paper.
- In a large bowl, whisk together all-purpose flour, ground pistachios, baking powder, and salt.
- In another bowl, beat together eggs, granulated sugar, and melted butter until well combined. Add milk and vanilla extract, mixing until smooth.
- Gradually add the dry ingredient mix to the wet ingredients, gently stirring until just combined.
- Pour the batter into the prepared baking sheet and spread it out evenly. Bake for about 30 minutes, or until a toothpick inserted comes out clean.
- Allow the cake to cool in the pan for 10 minutes, then transfer it to a wire rack to cool completely before slicing.
Notes


Leave a Comment